Getting Started Manual
Deepsound Software Development Kit
Copyright ⓒ 2026 / SEONGSANLAB Co., Ltd.
This manual is protected under national and international copyright laws. No part of this manual may be reproduced, distributed, translated, or transmitted in any form or by any means electronic, magnetic, optical, chemical, manual, or other form without the prior written permission of SEONGSANLAB Co., Ltd.
All rights reserved
If this document is distributed with software containing the End User License Agreement (EULA), this manual and the software described herein are licensed and may only be used or copied in accordance with the terms of the license. Except as permitted by such license, no part of this guide may be reproduced, stored in a retrieval system, or transmitted in any form or by any means (electronic, mechanical, recording, etc.) without the prior written permission of SEONGSANLAB Co., Ltd.
Caution & Limitation of Liability
The contents of this guide are provided for informational purposes only, subject to change without notice, and should not be construed as a commitment by SEONGSANLAB Co., Ltd. SEONGSANLAB Co., Ltd. assumes no responsibility or liability for any errors or inaccuracies that may appear in the informational content contained in this guide. Please note that existing illustrations or images that you wish to include in your project may be protected by copyright law.
DEEPSOUND is a registered trademark of SEONGSANLAB Co., Ltd. in the Republic of Korea and is the property of its owner.
Contact Information
- Head Office: SEONGSANLAB Co., Ltd. (P: 02-2039-5725 | F: 02-2039-5726)
- Website: www.dspaut.com | Email: admin@dspaut.com
- Quality: All work is performed in accordance with SEONGSANLAB Co., Ltd. quality standards.
DSK Revision History
| Version | Change Log | Date |
|---|---|---|
| 1.0 | Initial Release | 2026 |
1. INTRODUCTION
This document guides you on how to develop ultrasonic non-destructive testing software using DSK.
Development Environment: Windows 10, Visual Studio 2017, .NET Framework 4.5.2
1.1 Preparation
Since programs using DSK require various DLLs, they must always be executed in the specified execution location (e.g., c:/deepsound/dsktutorial/bin/release_x86).
In addition, CommonResource must exist in the directory two levels up (../../) from the location where the program is executed, and Python must be installed inside it. It is highly recommended to create a project within the installed dsktutorial directory if possible.
1.2 Getting Started
Run Visual Studio, open DskTutorial.sln, or refer to the settings below to create a new project.
New Project Creation Settings:
In the File → New → Project menu, configure as follows.
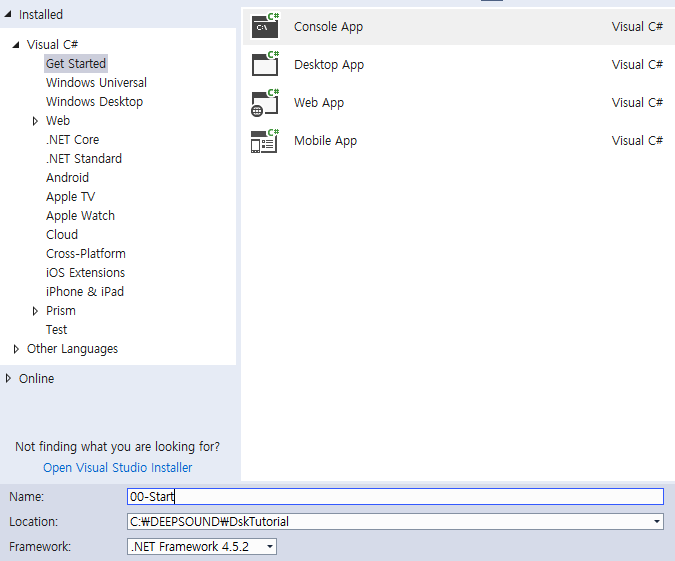
Figure: New Project Creation Settings Screen
After creating the project, open the properties (Property) screen of the 00-Start project.
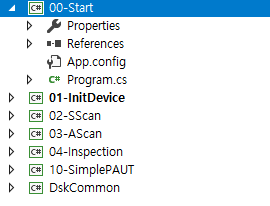
Figure: Open Project Property Window
Build Settings: Specify the Output path as the location where the execution file will be created.

Figure: Build Output path Settings
Adding Reference
DSK projects must have SVDSK.dll added as a reference. Select “Add Reference…” from the project’s References item.
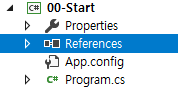
Figure: Add Reference Menu
Select the Browse tab and choose the svdsk.dll file within the output directory (../Bin/Release_x86) configured above.
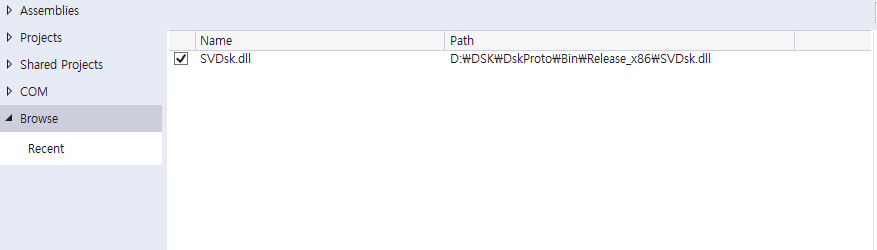
Figure: Select svdsk.dll File
If the reference is successfully added, you can verify it in the list as follows.
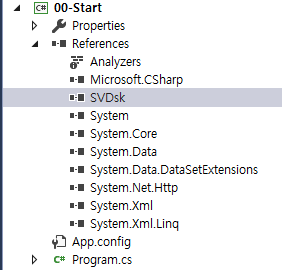
Figure: Verify Added Reference
Writing Program
Open Program.cs and add configurations for using DSK. Since DSK uses the DEEPSOUND namespace, using DEEPSOUND; must be included, and InitDsk must be called before use.
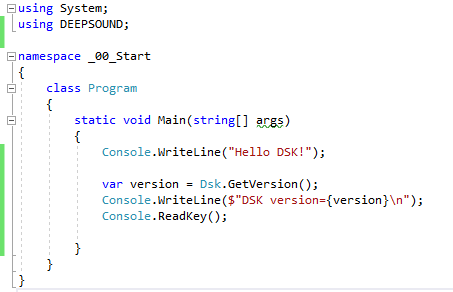
Figure: DSK Version Print Sample Code
If the following result is obtained by running 00_Start.exe generated after build, it is successful.

Figure: Program Execution Result Screen
2. TUTORIALS
The main sample projects included in DSK and their functions are as follows.
| Project Name | Description |
|---|---|
| 01 InitDevice | Example of hardware initialization and DMA-based data transmission implementation |
| 02 SScan | Example of S-Scan imaging and scan conversion implementation |
| 03 AScan | Example of A-Scan imaging and bitmap output implementation |
| 04 Inspection | Example of Encoder setting and inspection mode control |
| 10 SimplePAUT | Example of PAUT image implementation through comprehensive parameter control |
2.1 InitDevice
InitDevice is a basic example of receiving data via DMA after hardware initialization. All projects must reference SVDSK.dll and the common library DskCommon.

Figure: InitDevice Project Configuration
Upon execution, a screen receiving data from the hardware is displayed.
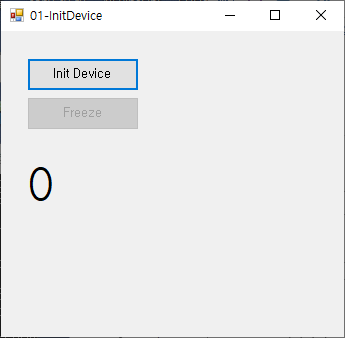
Figure: InitDevice Execution Screen
The core code is calling InitDsk and InitDevice. After the call, DSK initializes the hardware and delivers data through the callback function configured in SetCallbackFrame.

Figure: Initialization and Device Start Code
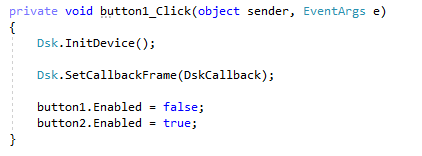
Figure: Initialization and Device Start Code
The callback function is the point where ultrasonic data delivered via USB DMA is finally received.
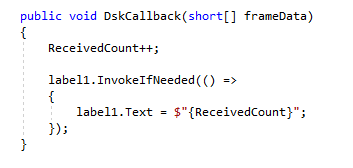
Figure: Data Reception Callback Function Example
Additionally, Dsk.Freeze and Dsk.UnFreeze can be used to control data acquisition.
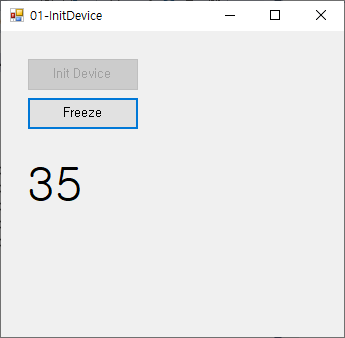
Figure: Data Freeze Function Test
2.2 S-Scan
The SScan project is an example of converting received Raw Data into a 2D image via scan conversion.
Scan Conversion Order:
- Check image size with
GetSScanWidthandGetSScanHeight - Check data information with
GetVectorCountandGetSampleCountPerVector - Generate 2D image data by calling
CalcSScanImage - Display on screen after color mapping
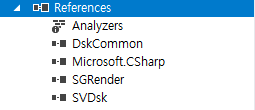
Figure: SScan Project Reference Settings
After copying data to the buffer in the callback function, the image is updated via a timer interrupt. To guarantee real-time performance, it is recommended to use a Queue method.
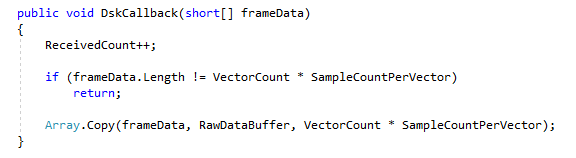
Figure: SScan Callback and Image Conversion Code
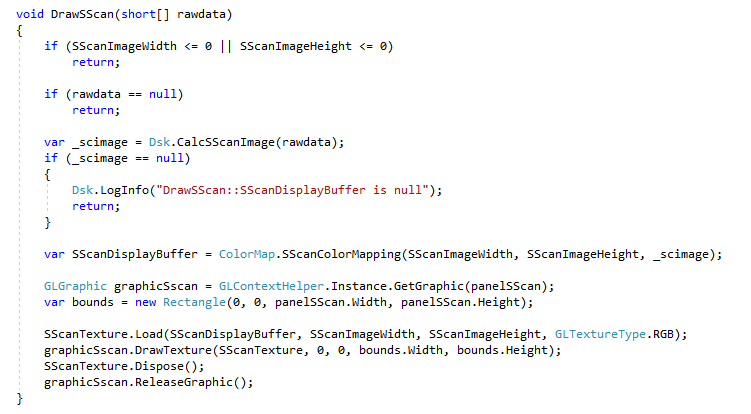
Figure: SScan Callback and Image Conversion Code
2.3 A-Scan
The AScan project extracts data at a specific vector location to generate an A-Scan image.
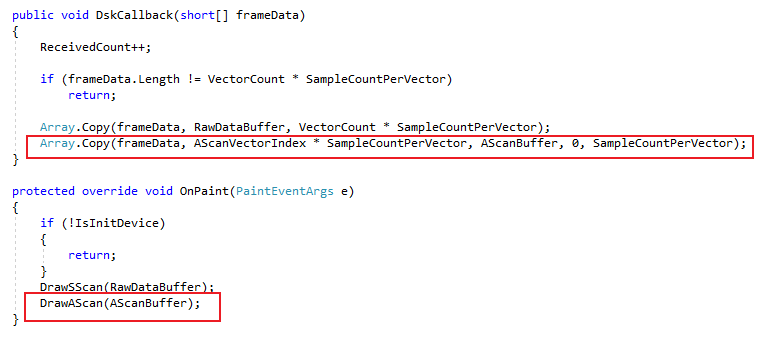
Figure: A-Scan Data Extraction Example
The DrawAScan function renders the A-Scan waveform on screen using a bitmap image.
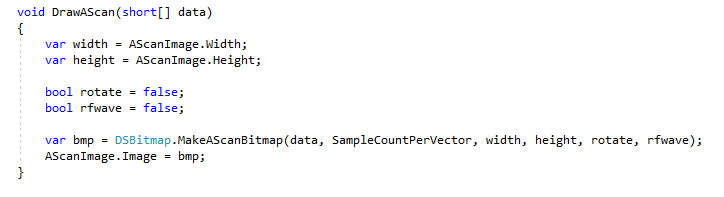
Figure: A-Scan Bitmap Output Screen
2.4 Inspection
This is an automatic inspection example to obtain images at designated positions using an Encoder.
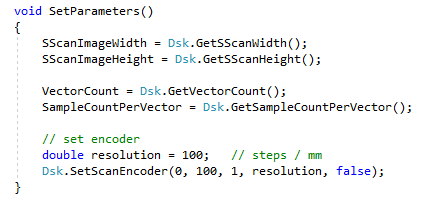
Figure: Encoder Setting and Inspection Control Code
After setting start/end positions, step, and pulse counts via SetScanEncoder, call UploadInspectionModeStart to start the inspection.
2.5 Simple PAUT
This is a comprehensive PAUT equipment implementation example. DSK functions are largely divided into Get (obtain values), Set (set values), and Upload (apply settings).
Parameter Delivery Process:
- Gui2Param: Save user input as internal variables
- Param2Dsk: Set values with DSK Set functions
- UploadAllParameters: Apply setting values to actual hardware/images
- Dsk2Param & Param2Gui: Reread changed values after application and update on screen
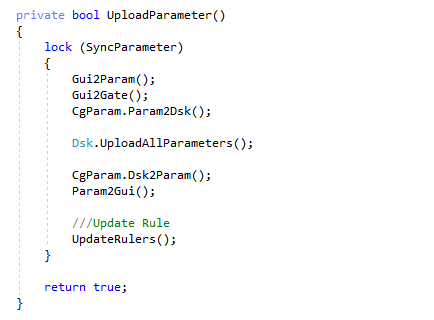
Figure: Parameter Update Flowchart
Load/Save Setup
Saving and loading settings can be easily implemented using the JsonFile2Object function which supports JSON serialization.
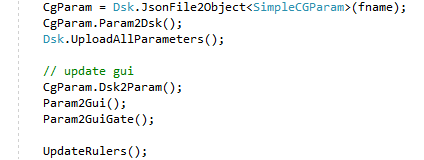
Figure: Setting Load and Save Implementation Example
Copyright © 2026, SEONGSANLAB Co., Ltd.
The copyright of this manual belongs to SEONGSANLAB Co., Ltd., and unauthorized reproduction or transmission is prohibited.
www.dspaut.com